Catalyst
Manage dependencies and automate your process without bloating your project workflow.
About Catalyst
Catalyst manages dependencies inside GameMaker projects and speeds up repetitive package management tasks. If you need a library inside your project, you can declare it once and let Catalyst resolve and install the full dependency tree.
Adding, removing, and upgrading packages stays predictable. Installing dependencies excludes vendored files from version control as much as the GameMaker project format allows, keeping your source tree cleaner.
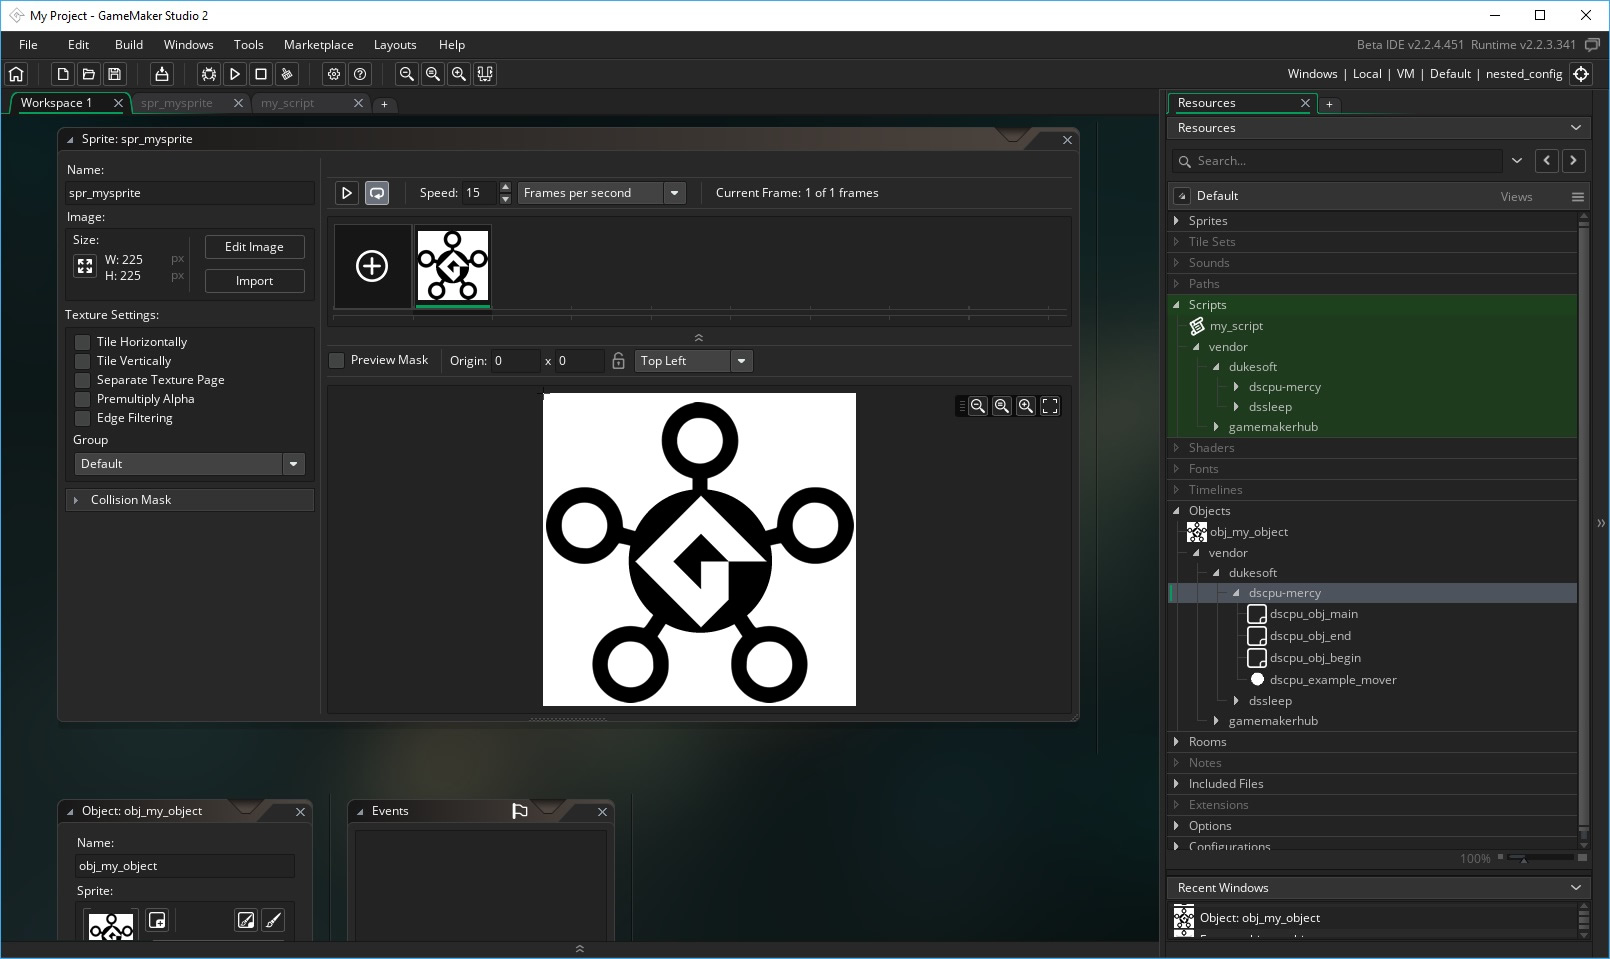
Inside the GameMaker project, all external files live in `vendor` folders.
How It Works
You create a catalyst.json file in your project folder, either by running catalyst init or by writing the file manually. You declare your package metadata, license, and dependencies, then run catalyst install to recursively solve and install them.
catalyst install after checking out the project. Vendored files should not be edited directly because those changes are not part of source control.
Initialize A Project
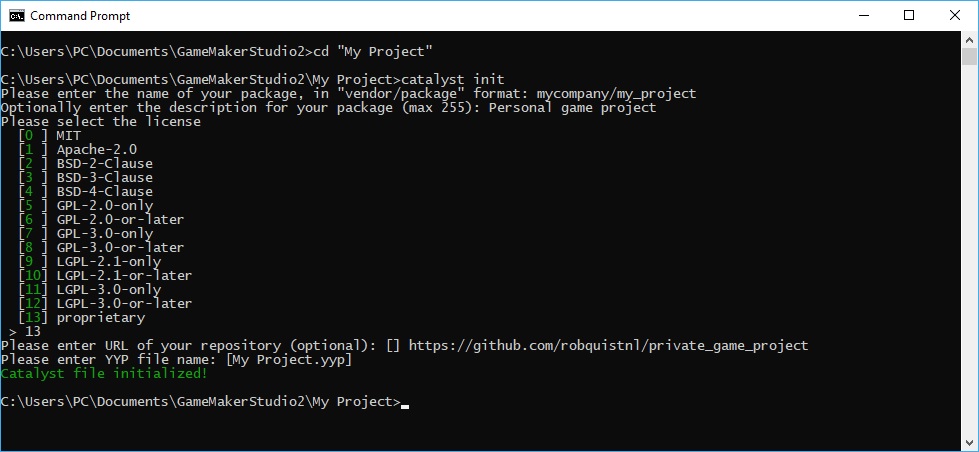
After installing Catalyst, open a terminal in your project folder and run catalyst init. This creates the main Catalyst file and asks for some basic metadata like the package name and description.
Even for private projects, the file is required for Catalyst to run.
Require Dependencies
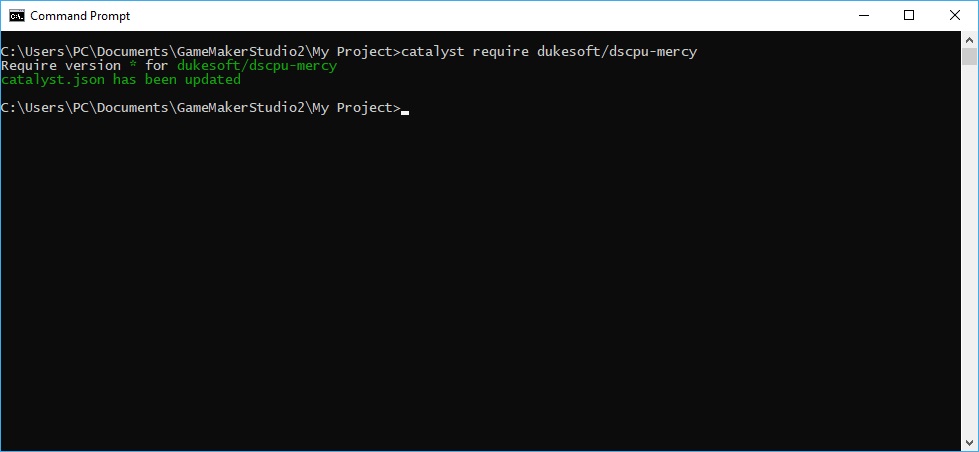
Once catalyst.json exists, you can declare dependencies directly. For example, to require dukesoft/dscpu-mercy, run catalyst require dukesoft/dscpu-mercy.
If you need a specific version range, add a constraint such as catalyst require dukesoft/dscpu-mercy@">=1.0 <2".
After the command runs, Catalyst updates your catalyst.json file automatically.
Install Dependencies
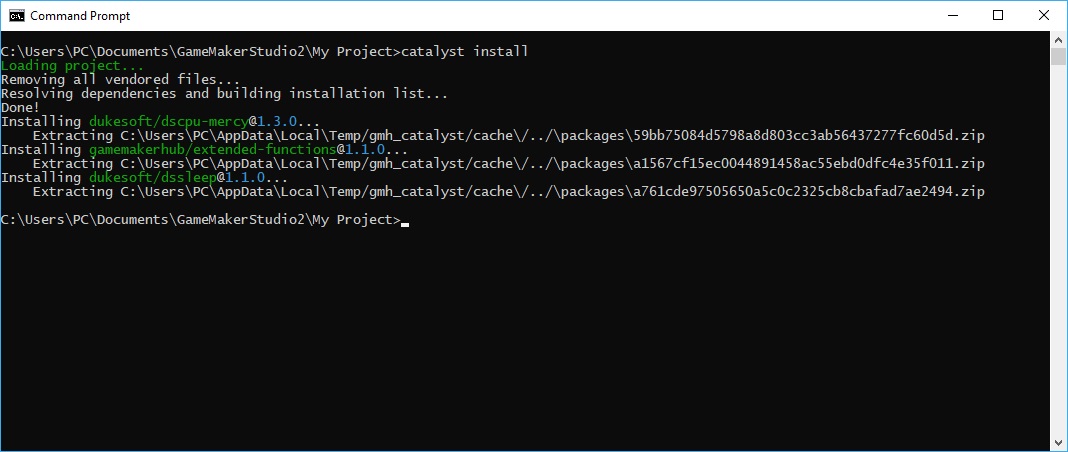
After adding packages, run catalyst install. Catalyst resolves the dependency tree, marks the required packages for installation, and writes them into your GameMaker project.
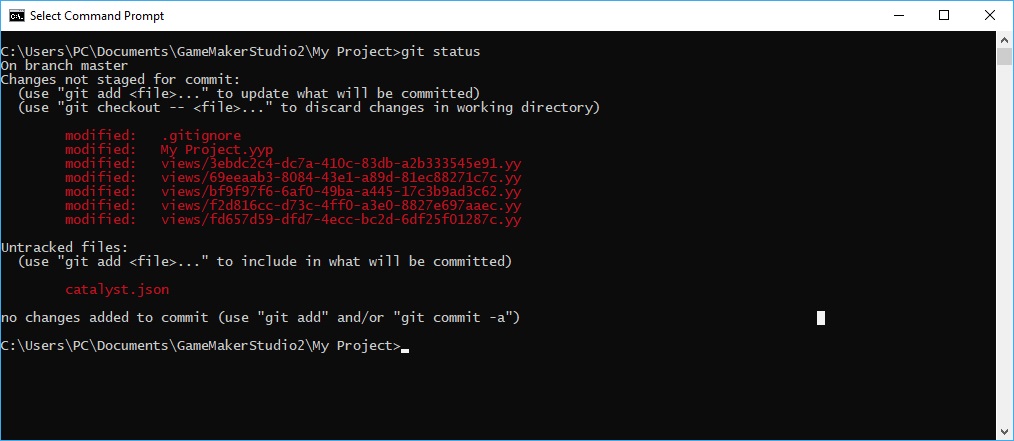
Only a minimal set of project files changes: some view files, the YYP, and the .gitignore file. Vendored files live in newly created vendor folders and should not be tracked in version control.
Because of the GMS2 directory structure, Catalyst cannot ignore vendored files only at directory level, so it writes explicit ignore entries.
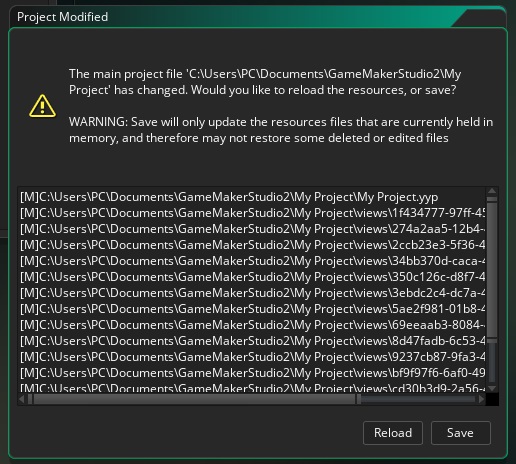
When you reopen GameMaker, the IDE notices the changed project files and asks you to reload them. Accept the reload and the installed dependencies are ready to use.
vendor folder can be replaced during reinstall or upgrade. Extend around those files or contribute changes upstream instead.
Make A Package
Creating a package is straightforward. Build a GMS2 project, run catalyst init in the project root, and initialize a Git repository if you want to publish it.
Once your project contains a valid catalyst.json, you can use it locally or share it publicly.
Use Local Packages
After initializing a project with Catalyst, you can use it from other projects by adding local package directories to the main project configuration:
{
    "name": "robquistnl/my-personal-game",
    "description": "A game I'm working on",
    "license": "proprietary",
    "homepage": "https://github.com/robquistnl",
    "yyp": "My Personal Game.yyp",
    "repositories": {
        "../": "directory"
    },
    "require": {
        "robquistnl/my-personal-project": "*",
        "dukesoft/dscpu-mercy": ">=1.2"
    }
}
The configured repository should point to a folder that contains project folders. A path like C:\Users\Username\GameMakerProjects works well if you keep local projects there.
Because local directory repositories do not expose version metadata, those packages are treated as version 1.0.0.
Share Packages
To publish a package, make sure the project is initialized with Catalyst and stored in Git. Tag the version you want to release using Semantic Versioning, then push the tag:
git tag 1.1.0
git push origin master --tags
Once the tagged version is available on GitHub, submit the package for indexation on GameMakerHub.